Microphone Field Guide
A field guide to the microphones available for our Recording Fundamentals independent study group — organized by transducer type, because how a microphone turns air into voltage determines almost everything else about it.
How this page was made. I assembled this guide with Claude as a writing and drawing partner. The inventory is either my own or UCF’s; the explanatory text and the diagrams were drafted with AI assistance from it, and I reviewed and edited the result. There’s a fuller note at the bottom of the page.
Before we start: every mic answers three questions
Whatever is printed on the body, every microphone you pick up is telling you three things. Get in the habit of asking them in this order.
- How does it convert sound into electricity? Dynamic, condenser, or ribbon. This sets the sensitivity, the transient response, the fragility, and whether it needs power.
- Which directions does it listen to? The polar pattern. This is what you actually aim — and just as importantly, it tells you where the microphone is deaf, which is often the more useful piece of information.
- Does it need 48 volts? Phantom power. Fourteen of the twenty-two mics here do. Two of the ones that don’t will still surprise you, and we’ll get to why.
Everything below is an elaboration of those three questions.
At a glance
| Total microphones | 22 models · 32+ individual pieces |
| By transducer | 15 condenser · 5 dynamic · 2 ribbon |
| Require 48V phantom | 14 of 22 |
| Capable of stereo on their own | 4 (Royer SF-12, Schoeps MSTC 74, Shure MV-88, Zoom H3-VR) |
| Multi-pattern | 4 (AKG C414 XLII, Townsend Sphere L22, Schoeps MK5, Shure MV-88) |
| Storage locations | Home Studio (11) · RH Sound Booth (5) · UCF Office (5) · SPA Recording Studio (1) |
Part 1 — The three transducer types
| Dynamic | Condenser | Ribbon | |
|---|---|---|---|
| How it works | A coil attached to the diaphragm moves through a magnetic field and generates a current | A charged diaphragm and a fixed backplate form a capacitor; the diaphragm’s motion changes the capacitance | A thin corrugated aluminum ribbon is suspended directly in a magnetic field and moves with the air |
| Needs power? | No | Yes — 48V phantom, or a battery/USB bus | Classically no. Active ribbons do — see below |
| Sensitivity | Low | High | Low to moderate |
| Transient response | Slower — rounds off fast attacks | Fastest — catches stick and mallet detail | Fast, but with a naturally soft top end |
| Handles loud sources | Extremely well | Well, usually with a pad | Well, but hates wind and air blasts |
| Fragility | Very rugged | Moderate | Handle with care |
| In this collection | 5 | 15 | 2 |
Three sentences to hang onto:
- A dynamic mic is a loudspeaker running backwards. That’s not a metaphor — it’s the same motor, and one of the mics downstairs is literally a speaker driver used as a microphone.
- A condenser needs power because there’s no power in the signal until the electronics make some. That’s also why it hears so much more than a dynamic.
- A ribbon is bi-directional because of its geometry, not by design choice. Both faces of the ribbon are open to the air, so it responds to the difference in pressure across it — which means it must be equally sensitive front and back, and deaf at the sides.
Dynamic microphones
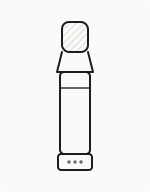
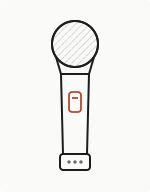
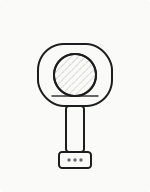
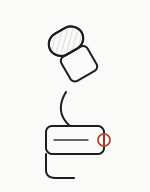
Five in the collection, and four of them are drum mics. This is not a coincidence: a moving coil is heavy, which makes it slow, which makes it forgiving of enormous transients that would send a condenser into distortion. None of them need phantom power.
 |  |  |  | 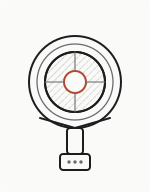 |
|---|---|---|---|---|
| Shure SM57 | Shure SM58S | Shure PG52 | Shure PG56 | Solomon LoFReQ |
Inventory
| Model | Qty | Pattern | Imaging | 48V | Location | Notes |
|---|---|---|---|---|---|---|
| Shure SM57 | — | Cardioid | Mono | No | UCF Office | The default answer to “what do I put on the snare” |
| Shure SM58S | — | Cardioid | Mono | No | UCF Office | Same cartridge as the SM57 behind a ball grille; the S is an on/off switch |
| Shure PG52 | 1 | Cardioid | Mono | No | Home Studio | Kick drum mic — PGDMK6 kit |
| Shure PG56 | 3 | Cardioid | Mono | No | Home Studio | Snare and toms, rim-clamp mounted — PGDMK6 kit |
| Solomon LoFReQ | 1 | Bi-Directional | Mono | No | Home Studio | Sub-kick: a speaker driver wired in reverse |
A note on the PG drum pack. The PG52, PG56 ×3, and PG81 ×2 in this inventory are the six microphones of Shure’s PGDMK6 kit, sold for a five-piece drum set: one kick, three rim-mounted dynamics for snare and toms, and a pair of pencil condensers for overheads. Four of those six are dynamics; the two overheads are condensers, which is why they show up in a different section of this page.
The LoFReQ is the interesting one. It isn’t a conventional microphone at all — it’s a loudspeaker driver used as a transducer in reverse. It captures almost nothing above 2–3 kHz, which sounds like a defect until you understand the job: it is there to be blended underneath a real kick mic to add weight that a normal capsule can’t reach. On its own it sounds like a pillow. Phase alignment against the other kick mic is not optional — it’s the whole technique. It’s also our only dynamic with a figure-8 pattern, and that’s a consequence of its speaker-cone geometry rather than a design goal.
Condenser microphones
Fifteen models, and the widest range of anything we own — from a $99 entry-level side-address to Schoeps capsules and a pair of C414s. Thirteen of the fifteen run on 48V phantom; the Zoom and the Shure MV-88 carry their own power.
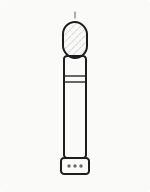 | 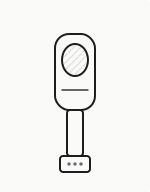 | 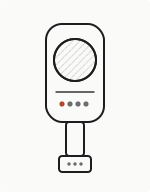 |  |
|---|---|---|---|
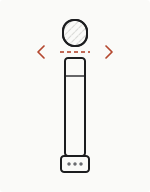
| Pencil / small-diaphragm sE RN17 · Røde NT5 · Shure PG81 · Earthworks TC20 · PreSonus PRM-1 | Compact side-address Audio-Technica AT2021 | Large-diaphragm AKG C414 XLII · Townsend Sphere L22 · Audio-Technica AT2020 | Modular capsule Schoeps Colette MK5 · Schoeps Colette MK21 |
 |  |  | 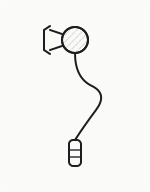 |
|---|---|---|---|
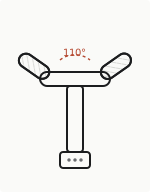
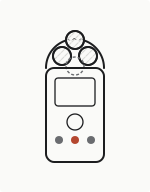
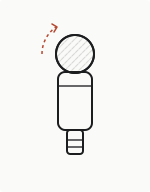
| Fixed stereo array Schoeps MSTC 74 U | Ambisonic recorder Zoom H3-VR | Mobile stereo Shure MV-88 | Lavalier Movo LV4-O |
Inventory
| Model | Qty | Pattern | Imaging | 48V | Location | Notes |
|---|---|---|---|---|---|---|
| AKG C414 XLII/ST | 2 | Bi-directional, Cardioid, Hypercardioid, Omni, Wide cardioid | Mono | Yes | RH Sound Booth | Matched stereo pair. Nine selectable patterns counting the four intermediate positions |
| Schoeps Colette Series MK5 | 2 | Cardioid, Omni | Mono | Yes | SPA Recording Studio | Mechanically switching capsule — you physically change the acoustic design |
| Schoeps Colette Series MK21 | 2 | Wide cardioid | Mono | Yes | Home Studio | Directional control with some room still in the sound |
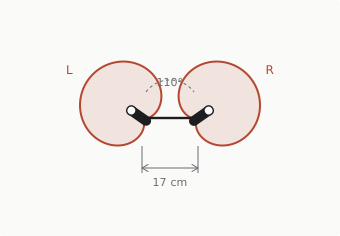
| Schoeps MSTC 74 U ORTF | 2 | Cardioid | ORTF, Stereo | Yes | RH Sound Booth | Two matched MK4 cardioids fixed at 17 cm / 110° on one T-shaped body |
| Townsend Labs Sphere L22 | 2 | Bi-directional, Cardioid, Omni | Mono, Stereo | Yes | Home Studio | Dual-capsule modeling mic. Discontinued; now sold as the UA Sphere DLX |
| sE Electronics RN17 | 2 | Cardioid | Mono | Yes | RH Sound Booth | Small-diaphragm condenser with a Rupert Neve output stage |
| Earthworks TC20 | 2 | Omni | Mono | Yes | Home Studio | Very fast, very flat omni — excellent for percussion transients |
| Røde NT5 | 2 | Cardioid | Mono | Yes | Home Studio | Matched pencil pair; the everyday overhead/room option |
| Shure PG81 | 2 | Cardioid | Mono | Yes | Home Studio | Overhead pair — PGDMK6 kit |
| PreSonus PRM-1 | 1 | Omni | Mono | Yes | Home Studio | Measurement mic — built for room analysis and tuning, not for tracking |
| Audio-Technica AT2020 | 1 | Cardioid | Mono | Yes | UCF Office | Entry-level large-diaphragm workhorse |
| Audio-Technica AT2021 | 1 | Cardioid | Mono | Yes | Home Studio | Compact side-address |
| Movo LV4-O | 1 | Omni | Mono | Yes | Home Studio | Lapel/lavalier mic |
| Shure MV-88 | 1 | Bi-directional, Cardioid, Raw mid-side | Mono, Stereo | No | UCF Office | Digital mobile mic; powered over its connector. Records raw M-S for decoding later |
| Zoom H3-VR | 1 | (see notes) | Ambisonic, Stereo | No | UCF Office | 360° recorder with a four-capsule ambisonic array, auto mic position detection, and built-in encoding/decoding |
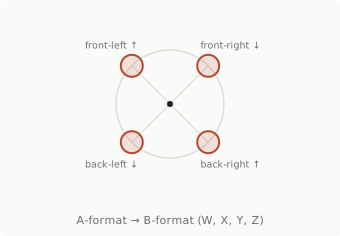
Why the H3-VR’s pattern field is blank. Each of its four capsules is a cardioid, but no single one of them is what you point at anything. The array is the instrument. What comes out is a four-channel A-format signal that gets encoded to B-format (W, X, Y, Z) — a description of the whole sound field that you steer after the recording. Asking for its polar pattern is asking the wrong question.
The Sphere L22 is a different kind of animal. It has two capsules and records both to two channels. The plugin then models the polar pattern and the microphone itself after the fact. It is the clearest argument I can give you for why understanding patterns still matters even when software can change them later: the plugin can only work with what the two capsules actually captured, and where you put the stand is still permanent.
Ribbon microphones
Two, and they make the point better than any lecture could — because one of them needs phantom power and the other one might be damaged by it.
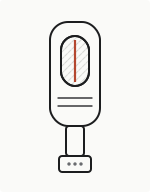 | 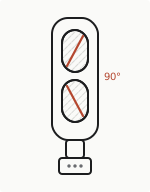 |
|---|---|
| sE Electronics RNR1 Active ribbon — requires 48V | Royer SF-12 Passive stereo ribbon — Blumlein in a single body |
Inventory
| Model | Qty | Pattern | Imaging | 48V | Location | Notes |
|---|---|---|---|---|---|---|
| sE Electronics RNR1 | 2 | Bi-directional | Mono | Yes | RH Sound Booth | Active ribbon, Rupert Neve transformers. 20 Hz–20 kHz — it does not have the classic ribbon HF rolloff |
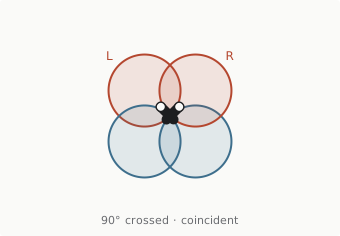
| Royer SF-12 | 1 | Bi-directional (Blumlein) | Stereo | No | RH Sound Booth | Two ribbons crossed at 90° in one body — a coincident Blumlein pair, permanently aligned |
The phantom power rule for ribbons
Passive ribbons (the SF-12) generate their signal entirely from the ribbon moving in the magnetic field. They need no power. With a correctly wired cable, 48V sits equally on pins 2 and 3 and nothing happens — but a miswired cable, a faulty patch point, or hot-patching while phantom is engaged can push a DC pulse across the ribbon and stretch or tear it. The ribbon is roughly two microns thick. It does not heal.
Active ribbons (the RNR1) put a preamplifier behind the ribbon, and that preamp must have 48V to work. No phantom, no signal.
So “ribbon means no phantom power” is wrong, and “always use phantom power” is also wrong. The working habit that covers both: mute the channel, connect the cable, then turn phantom on — and turn it off before you unplug anything. Never patch a live line.
Part 2 — Polar patterns
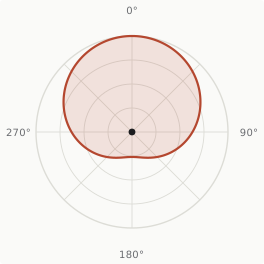
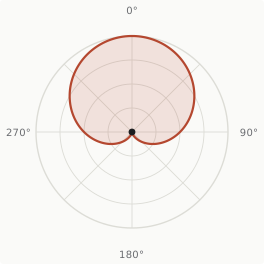
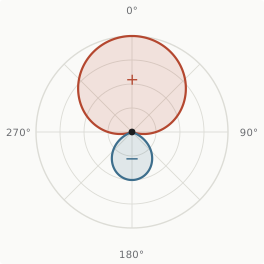
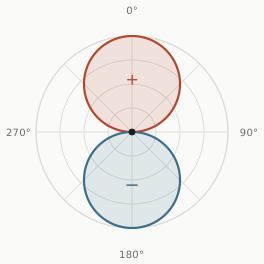
The polar pattern is a map of how sensitive the microphone is at every angle around it. Zero degrees is the front. The shaded lobe is the pickup; where the lobe pinches to nothing, the mic is deaf.
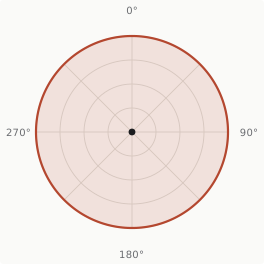 |  |  |  |  |
|---|---|---|---|---|
| Nothing rejected | ~12 dB down at the rear | Null at 180° −6 dB at the sides | Nulls at ~110° small reversed rear lobe | Nulls at 90° and 270° rear lobe is full strength, opposite polarity |
| Earthworks TC20 Movo LV4-O PreSonus PRM-1 Schoeps MK5 (switched) | Schoeps MK21 AKG C414 (setting) | SM57 · SM58S · PG52 · PG56 PG81 · RN17 · NT5 · AT2020 AT2021 · MSTC 74 · MK5 (switched) | AKG C414 (setting) | Royer SF-12 sE RNR1 Solomon LoFReQ C414 & Sphere L22 (settings) |
Four things the diagrams are telling you
The null is the tool. Beginners aim the front of the mic. Experienced engineers aim the null. A cardioid has a null at 180° — point it at the monitor wedge, not just at the player. A figure-8 is deaf at 90° and 270°, which is why it is the best mic in the building for isolating two sources sitting next to each other. A hypercardioid’s nulls are at roughly 110°, not at the rear — the most common mistake with a hypercardioid is aiming its back at the thing you want to reject and wondering why it’s still there.
Directional mics have proximity effect; omnis don’t. Every pattern except omni works by comparing the pressure at the front of the diaphragm to the pressure at the back. That mechanism makes low frequencies rise steeply as you move within a foot or so of the source. Figure-8 has the strongest proximity effect of all. It is an effect you can use deliberately — or one that ruins a close-miked tom without your noticing. If you want to get close without the bass bloom, reach for an omni.
Polarity, not just level. In the hypercardioid and figure-8 diagrams, the rear lobe is drawn in a different color, and that’s not decoration: sound arriving from behind comes out of the mic with its polarity inverted. This is the entire operating principle of mid-side recording, and it’s also how you accidentally get a hollow, phasey ensemble recording when a figure-8’s back lobe picks up a source you forgot about.
Off-axis sound is colored, not just quieter. The diagram is one number per angle, but a real microphone’s pattern changes with frequency — patterns tighten at high frequencies and loosen at low ones. This is why a cymbal bleeding into the back of a cardioid snare mic sounds wrong rather than just soft. A manufacturer’s spec sheet usually plots several frequencies on the same polar graph, and comparing those curves tells you more about a mic’s character than the single-word pattern name does.
On these diagrams: the rings here are linear sensitivity, drawn from the standard first-order equation r(θ) = A + B·cos θ. Cardioid is A = B = 0.5; figure-8 is A = 0, B = 1; omni is A = 1, B = 0. Every pattern in between — including all nine of the C414’s — is just a different balance of those two terms. Manufacturer plots use a decibel scale, so the shapes look fatter than these do.
Part 3 — Mono, stereo, and the “imaging” column
Most of the inventory is mono: one capsule, one channel, and any stereo image you get comes from how you arrange several of them. Four microphones here produce a stereo image on their own.
 |  |  |  |
|---|---|---|---|
| Schoeps MSTC 74 U | Royer SF-12 | Shure MV-88 | Zoom H3-VR |
| Near-coincident | Coincident | Coincident | Coincident, 3D |
ORTF — two cardioids, capsules 17 cm apart, splayed 110°. The spacing is deliberately close to the distance between human ears, so the pair captures both level differences and small timing differences, the two cues your hearing actually uses. It covers roughly a 95–100° arc in front of it, which is a convenient match for a percussion ensemble on a stage. Our MSTC 74 has the geometry built in and permanently correct, which removes the most common way to get ORTF wrong.
Blumlein — two figure-8s crossed at 90°, in the same place in space. Because the capsules are coincident there are no timing differences at all; the image is built purely from level. It is the most accurate stereo image you can capture and the least forgiving, because those rear lobes hear the room behind the mic at full strength. In a good hall it’s glorious. In a bad room it’s a mess. The SF-12 is a Blumlein pair permanently built into one body.
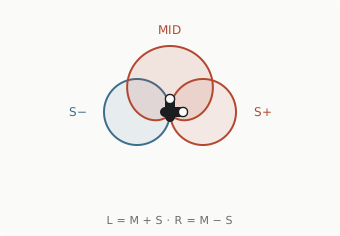
Mid-side — a forward-facing mic for the middle and a sideways figure-8 for the width. Decode with L = M + S and R = M − S. Two things make this worth knowing: you can adjust the stereo width after the session by changing how much S you add, and the sum collapses to the mid mic alone, so it is perfectly mono-compatible. The MV-88 can record raw mid-side for exactly this reason. You can also build an M-S rig by hand from what we have — a C414 in cardioid plus an RNR1 in figure-8 would do it.
Ambisonic — four capsules arranged on a tetrahedron sample the entire sphere around the mic. The raw four channels (A-format) get converted to B-format — W, X, Y, Z — which is a mathematical description of the sound field rather than a fixed stereo image. You can rotate the listener’s orientation, or decode to binaural, stereo, or surround, long after the recording is over. The H3-VR does the encoding internally.
Part 4 — Preamps: the next link in the chain
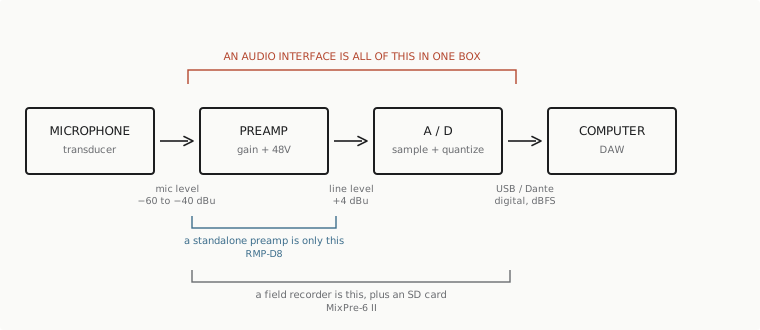
A microphone’s output is tiny. A condenser on a loud source might put out a few millivolts; a passive ribbon on a quiet one puts out a small fraction of that. Line level — what the rest of the studio expects — is around +4 dBu, which is roughly a thousand times larger. Something has to bridge that gap, and whatever does it is the most consequential piece of electronics in the chain.
Here is why. The preamp is the only place in the signal path where the audio is still quiet enough for the equipment’s own noise to matter. Turn the gain up 60 dB and you amplify the microphone’s signal by a factor of a thousand — and the preamp’s own hiss right along with it. Everything downstream inherits that noise permanently. No plugin removes it.
What a preamp actually does
Four jobs, in rough order of how much they affect what you hear.
- Applies gain. Typically 20–60 dB, occasionally more. This is the whole point.
- Supplies 48V phantom power to whatever needs it — fourteen of our twenty-two microphones.
- Presents an input impedance to the microphone. The mic is not just a voltage source; it is loaded by whatever it plugs into, and that loading affects its frequency response and how it behaves on transients. Ribbons are the most sensitive to this.
- Adds its own character. Transformers, discrete class-A circuitry, and deliberate harmonic content are what people are usually buying when they buy an expensive preamp. This is a real effect and also the one most vulnerable to expectation bias — which is precisely why we test blind.
The one specification worth learning: EIN
Equivalent input noise is the preamp’s own noise, referred back to its input — the output noise minus the gain. It lets you compare preamps directly, independent of how much gain each was set to.
The useful thing about EIN is that it has a hard physical floor. A 150-ohm resistor — roughly what a microphone looks like electrically — generates thermal noise all by itself, and Sound Devices puts that floor at −133 dBV. No preamp can ever be quieter than the resistor at its input. So:
- −133 dBV — physics
- −130 dBV — the MixPre-6 II’s published figure, A-weighted
Three decibels from the theoretical limit, in a $1,195 box you can run on AA batteries. That is worth sitting with for a moment before anyone tells you that good preamps are expensive.
Compare EIN figures carefully, or not at all. A number is only meaningful alongside its source impedance (150 Ω is standard), its weighting (A-weighted reads lower than unweighted), and its measurement bandwidth. A manufacturer quoting an A-weighted figure over 20 kHz against a competitor’s unweighted figure over 500 kHz is comparing nothing at all. Where a spec sheet omits the conditions, treat the number as marketing.
Where this bites in our locker: the Royer SF-12 is a passive ribbon. Its output is low even by ribbon standards, and capturing a marimba at a sensible distance can ask for 60–70 dB of gain. That is exactly the condition under which a mediocre preamp audibly hisses and a good one does not. On a close-miked snare through an SM57 at 30 dB of gain, by contrast, almost anything sounds fine. The preamp matters most where the signal is smallest.
The two we have this semester
| Rupert Neve Designs RMP-D8 | Sound Devices MixPre-6 II | |
|---|---|---|
| What it is | 8-channel networked mic preamp | 6-input recorder, mixer and interface |
| Price | ~$5,999 | ~$1,195 |
| Inputs | 8 × XLR | 4 × XLR mic/line + 2 × aux |
| Gain | 0–60 dB in 1 dB steps | +6 to +76 dB (to +96 dB mic-to-record) |
| Circuit | Class-A, custom RND transformer on every channel | Kashmir preamps |
| Noise | −91 dBFS at +60 dB gain; −110 dBFS at unity | EIN −130 dBV (−128 dBu), A-weighted |
| Dynamic range | 110 dB | 32-bit float removes the ceiling question |
| Pad / filter | −10 dB pad; HPF −3 dB at 80 Hz, 12 dB/oct | Pad and HPF per channel |
| Input impedance | 5.5 kΩ | — |
| Max input | +25.5 dBu | — |
| Conversion | 24-bit / 192 kHz, built in | 16, 24 or 32-bit float; 44.1–192 kHz |
| Gets audio out via | Dante (redundant secondary port, AES67 mode, DDM ready), plus 4 dual-channel AES XLR outputs | USB 8-in/4-out at 44.1–96 kHz, or SD card |
| Records on its own? | No | Yes — SD/SDHC/SDXC to 512 GB |
| Control | Mac/PC remote app, OLED and local controls | Touchscreen and knobs |
| Power | Redundant internal supplies, 2RU rack | AA sled, USB bus, AC, or L-mount battery |
These two are not competitors. They answer different questions.
The RMP-D8 is an infrastructure decision. Eight channels of transformer-coupled class-A gain that live in a rack, get controlled from a laptop anywhere on the network, and put their output on Dante — so the audio reaches any other Dante device in the building over one Cat-5 cable rather than eight XLRs. The gain is recallable, which means a session can be reproduced exactly next week. That combination is what you are paying for, at least as much as the sound.
The MixPre-6 II is a location decision. It runs on AA batteries, fits in a bag, records to its own SD card with no computer present, and doubles as a USB interface when there is one. If the recording happens somewhere without a machine room, this is the tool.
A useful exercise. The RMP-D8 costs five times what the MixPre-6 II does and has a published noise figure that, on paper, looks worse — because it is quoted as dBFS at the converter output rather than as EIN at the input. Those two numbers are measuring different things and cannot be compared. Working out why is a better test of whether you understand a spec sheet than any exam question I could write.
What 32-bit float actually buys you
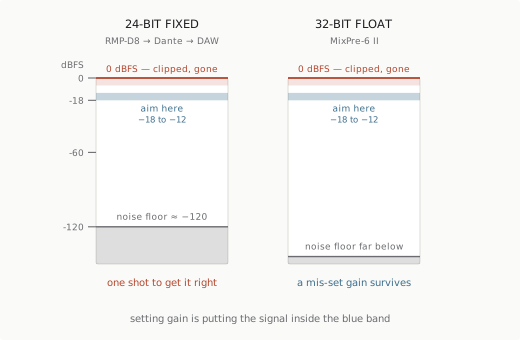
In 24-bit fixed point there is a ceiling at 0 dBFS. Cross it and the waveform is truncated — the information is gone and no amount of pulling the fader down afterwards restores it. There is also a floor: record too quietly and the signal sits close to the noise, where turning it up later turns the noise up too. So you aim for a window, conventionally −18 to −12 dBFS on peaks, and you have one chance to get it right during the take.
32-bit float changes the arithmetic. The format’s range is so large that neither the ceiling nor the quantization floor is reachable in practice, and the MixPre-6 II pairs it with dual A/D converters per channel so the analogue side can’t clip either. A take recorded 30 dB too hot or too quiet can be normalized afterwards with nothing lost.
What it does not buy you. 32-bit float does nothing about the analogue noise floor. The preamp’s EIN, the microphone’s self-noise, and the air conditioning in the room are all captured before the number format has any say in the matter. If a take is hissy because the gain was low into a noisy preamp, float preserves that hiss with magnificent precision. It removes a class of catastrophic mistakes; it does not make a quiet recording into a clean one.
Preamp or audio interface — what’s the actual difference?
Strictly: a microphone preamp only applies gain. An audio interface bundles a preamp together with A/D and D/A conversion, clocking, monitoring, routing and a connection to a computer. Almost every interface has preamps in it. The question is never really “preamp or interface” — it is how good are the preamps in the box you already own, and does the difference matter for what you are recording?
| Dedicated preamp | Audio interface | |
|---|---|---|
| Gain | Its entire job | One of several jobs |
| A/D conversion | Sometimes (the RMP-D8 does) | Always |
| Playback / monitoring | No | Yes |
| Routing, DSP, mixing | No | Usually |
| Talks to a computer | Only via a converter or a network | Directly |
| Channel count | Scales by adding boxes | Fixed, plus ADAT/Dante expansion |
| Gain recall | Common on networked units | Varies |
| Cost per channel | High | Low |
Where the money genuinely goes, in descending order of audibility:
- Clean gain at high settings. The single most defensible reason to buy a better preamp. At 60–70 dB — ribbons, distant classical, quiet solo percussion — the difference between a good preamp and a budget one is plainly audible as hiss. At 30 dB it usually is not.
- Headroom. A high maximum input level (the RMP-D8’s +25.5 dBu, plus its −10 dB pad) means a condenser two feet from a crash cymbal does not overload the input stage.
- Input impedance. Affects how the microphone itself behaves, ribbons most of all. Some preamps make it switchable; most interfaces do not.
- Deliberate character. Transformers and class-A circuits add harmonic content that many engineers want. This is a genuine, measurable effect — and also the claim most contaminated by price expectation, which is why it belongs in a blind test rather than an argument.
- Workflow. Channel count, remote recall, networked distribution. Not a sound-quality argument at all, and often the real reason a facility buys one.
Where an interface is simply the right answer: loud close-miked sources at moderate gain, tracking where monitoring latency matters, any situation needing playback as well as capture, and any budget where eight channels of interface costs less than one channel of boutique preamp.
The honest version. Converter quality and preamp quality are separate questions that marketing routinely conflates. A great preamp feeding a mediocre converter is not obviously better than the reverse. And in a level-matched blind comparison, the gap between a competent modern interface preamp and a high-end outboard one at moderate gain is far smaller than the price difference suggests — smaller, almost always, than the difference made by moving the microphone six inches. We are running exactly this kind of blind comparison on microphones this semester. The same experiment on preamps would be humbling, and we should probably do it.
Setting gain, practically
- Have the player perform the loudest passage they will actually play, not a polite sample.
- Raise gain until peaks land around −18 to −12 dBFS. On 32-bit float you have far more latitude, but aiming here anyway keeps the analogue stage in its comfortable range.
- Check the quiet passages. If the noise floor is audible between notes, the problem is upstream — the room, the microphone, or a preamp being asked for more gain than it has to give cleanly.
- Engage the pad before reaching for less gain if the input stage itself is overloading; a pad protects the front end, where turning the gain knob down does not.
- Write the gain settings down. On the RMP-D8 the app does this for you, which is a large part of why it exists.
Part 5 — What would you reach for?
No right answers. These are the conversations I want us to have.
A snare drum, close. Reach for the SM57. It has survived sixty years of this for a reason: it can take the SPL, its slowness is flattering on a stick attack, and its cardioid null can be aimed at the hi-hat. Experiment: put an RNR1 on it instead and listen to what a fast transducer does to the same stick. Then think about where those figure-8 rear lobes are pointing.
A marimba. Reach for the NT5 pair or the RN17 pair — spaced, above and slightly behind the player, so you cover the range of the instrument rather than one octave of it. Experiment: a TC20 pair instead. Omnis have no proximity effect, so you can get closer without the low end blooming, and they usually have the flattest low-frequency response in the locker — which matters on an instrument with low A resonators.
Timpani. Reach for a TC20 or a PG52, depending on what you want. The omni gives you the actual pitch and the room; the kick mic gives you the thump and the mallet. Experiment: both, and blend them. Then check that blending them doesn’t produce a comb filter — this is where we talk about the 3:1 rule.
A percussion ensemble in a good hall. Reach for the MSTC 74. Set it up, get the height and distance right, and you’re done — the geometry can’t drift. Experiment: the SF-12 in Blumlein, and hear what happens when the rear lobes bring the hall into the picture. Compare them in the same position and you will understand near-coincident versus coincident better than from any diagram.
Voiceover or narration for a project. Reach for the C414 or an AT2020 in cardioid, close, off-axis to the plosives. Experiment: the Sphere L22, and compare the models afterward. This is a good lesson in how much of “mic choice” is a decision you can defer — and how much of it (distance, room, angle) you cannot.
Cymbals and bright metallic percussion. Reach for the RNR1. A ribbon’s smooth top end is genuinely flattering on cymbals, and this one has real extension. Experiment: an AT2021 or a PG81 in the same spot and hear the difference between “detailed” and “harsh,” which is a distinction about your taste, not about the gear.
Field recording for a composition. Reach for the H3-VR. Capture the whole sphere, decide on the image later. Experiment: bring the MV-88 on your phone as well and compare a decided-in-advance stereo image with one you can still steer.
Checking out an unfamiliar room before a session. Reach for the PRM-1. That’s what it’s for — measurement, not tracking. Walk it around the space with an analyzer and find out where the problems are before you commit a mic stand to a position.
Part 6 — Where everything lives
| Location | Count | Microphones |
|---|---|---|
| Home Studio | 11 | Schoeps MK21 · Townsend Sphere L22 · Earthworks TC20 · Røde NT5 · Shure PG81 · Shure PG56 · Shure PG52 · Solomon LoFReQ · PreSonus PRM-1 · Audio-Technica AT2021 · Movo LV4-O |
| RH Sound Booth | 5 | AKG C414 XLII · Schoeps MSTC 74 U · sE RNR1 · sE RN17 · Royer SF-12 |
| UCF Office | 5 | Shure SM57 · Shure SM58S · Shure MV-88 · Zoom H3-VR · Audio-Technica AT2020 |
| SPA Recording Studio | 1 | Schoeps Colette MK5 |
Quick reference — the whole inventory
| Make | Model | Type | Qty | Polar pattern | Imaging | 48V | Location |
|---|---|---|---|---|---|---|---|
| AKG | c414 XLII/ST | Condenser | 2 | Bi-directional, Cardioid, Hypercardioid, Omni, Wide cardioid | Mono | Yes | RH Sound Booth |
| Audio-Technica | AT2020 | Condenser | 1 | Cardioid | Mono | Yes | UCF Office |
| Audio-Technica | AT2021 | Condenser | 1 | Cardioid | Mono | Yes | Home Studio |
| Earthworks | TC20 | Condenser | 2 | Omni | Mono | Yes | Home Studio |
| Movo | LV4-O | Condenser | 1 | Omni | Mono | Yes | Home Studio |
| PreSonus | PRM-1 | Condenser | 1 | Omni | Mono | Yes | Home Studio |
| Røde | NT5 | Condenser | 2 | Cardioid | Mono | Yes | Home Studio |
| Royer | SF-12 | Ribbon | 1 | Bi-directional, Blumlein | Stereo | No | RH Sound Booth |
| Schoeps | Colette Series MK5 | Condenser | 2 | Cardioid, Omni | Mono | Yes | SPA Recording Studio |
| Schoeps | Colette Series MK21 | Condenser | 2 | Wide cardioid | Mono | Yes | Home Studio |
| Schoeps | MSTC 74 U ORTF | Condenser | 2 | Cardioid | ORTF, Stereo | Yes | RH Sound Booth |
| sE Electronics | RN17 | Condenser | 2 | Cardioid | Mono | Yes | RH Sound Booth |
| sE Electronics | RNR1 | Ribbon | 2 | Bi-directional | Mono | Yes | RH Sound Booth |
| Shure | MV-88 | Condenser | 1 | Bi-directional, Cardioid, Raw mid-side | Mono, Stereo | No | UCF Office |
| Shure | PG52 | Dynamic | 1 | Cardioid | Mono | No | Home Studio |
| Shure | PG56 | Dynamic | 3 | Cardioid | Mono | No | Home Studio |
| Shure | PG81 | Condenser | 2 | Cardioid | Mono | Yes | Home Studio |
| Shure | SM57 | Dynamic | — | Cardioid | Mono | No | UCF Office |
| Shure | SM58S | Dynamic | — | Cardioid | Mono | No | UCF Office |
| Solomon | LoFReQ | Dynamic | 1 | Bi-directional | Mono | No | Home Studio |
| Townsend Labs | Sphere L22 | Condenser | 2 | Bi-directional, Cardioid, Omni | Mono, Stereo | Yes | Home Studio |
| Zoom | H3-VR | Condenser | 1 | (array) | Ambisonic, Stereo | No | UCF Office |
Notes on the data
- SM57 and SM58S quantities are blank in the source inventory. Worth counting before the next session.
- The MSTC 74 U is a single integrated stereo unit — one T-shaped body carrying two matched MK4 cardioid capsules — so “Qty 2” may mean two capsules rather than two units. Worth confirming.
- The Schoeps MK5 and MK21 are capsules, not complete microphones. They thread onto a CMC amplifier body, and the capsule is what determines the polar pattern. This is the most literal demonstration available of the fact that the pattern is a property of the acoustics, not the electronics.
- The Sphere L22 is discontinued and now sold by Universal Audio as the Sphere DLX. The hardware is the same.
- The C414 XLII has nine selectable patterns, not five — the five named ones plus four intermediate positions between them.
Reference links
- AKG C414 XLII — the nine-pattern spec sheet
- Schoeps MSTC 74 — ORTF geometry and P48 requirements
- sE Electronics RNR1 — active ribbon specifications
- Zoom H3-VR — ambisonic formats
- Shure MV88 — mid-side recording modes
- Sound On Sound: Solomon Mics LoFReQ — how a reverse speaker driver behaves
- Shure PGDMK6 kit contents
- Rupert Neve Designs RMP-D8 — the 8-channel Dante preamp’s full spec sheet
- Sound Devices MixPre-6 II — specifications, including the EIN figure
- Sound Devices: understanding microphone preamp noise — where the −133 dBV floor comes from
- Drum Set Miking Field Guide — the companion guide: choosing and placing these microphones on a drum set
How this page was made
I built this guide with Claude, and I’d rather say so plainly than leave you guessing — particularly on a page whose whole subject is learning to evaluate evidence for yourself.
What came from me. The inventory itself: twenty-two microphones I own or have access to through UCF, tracked in my own spreadsheet, along with the quantities, polar patterns, phantom power requirements and storage locations. The choice of what this page should cover and how it should be organized. The two preamps we use. And the editing.
What Claude did. Drafted the explanatory prose from that inventory, checked product specifications against manufacturer documentation, and generated the diagrams. The polar plots are computed from the first-order equation r(θ) = A + B·cos θ rather than traced from anyone’s spec sheet; the microphone illustrations are original line drawings of body styles — pencil condenser, side-address large diaphragm, ribbon, and so on — not renderings of specific products, and not manufacturer photography.
What that means for you as a reader. Every product specification here has a source, and those sources are linked in the references above — go to them if a number matters to your decision. AI-assisted writing can be confidently wrong, and I would rather you check than trust. If you find an error on this page, tell me and I’ll fix it; finding one would be a genuinely useful contribution to the course.
Why I’m telling you. You will use these tools in your own work. The professional norm that’s forming around them is disclosure of the kind you’re reading now — what the tool did, what the human did, and where the reader should verify. Treating that as ordinary rather than as a confession seems to me the right way to model it.
Copyright © Thad Anderson, 2026, Plus Two Media (ASCAP), All Rights Reserved